Reply to Re: Tile using Tutorials
If you don't have an account, just leave the password field blank.


Let me give the buildings a try.
First things first: realize that large buildings *without* a corner in front are not possible, simply because there are no appropriate roof sprites.
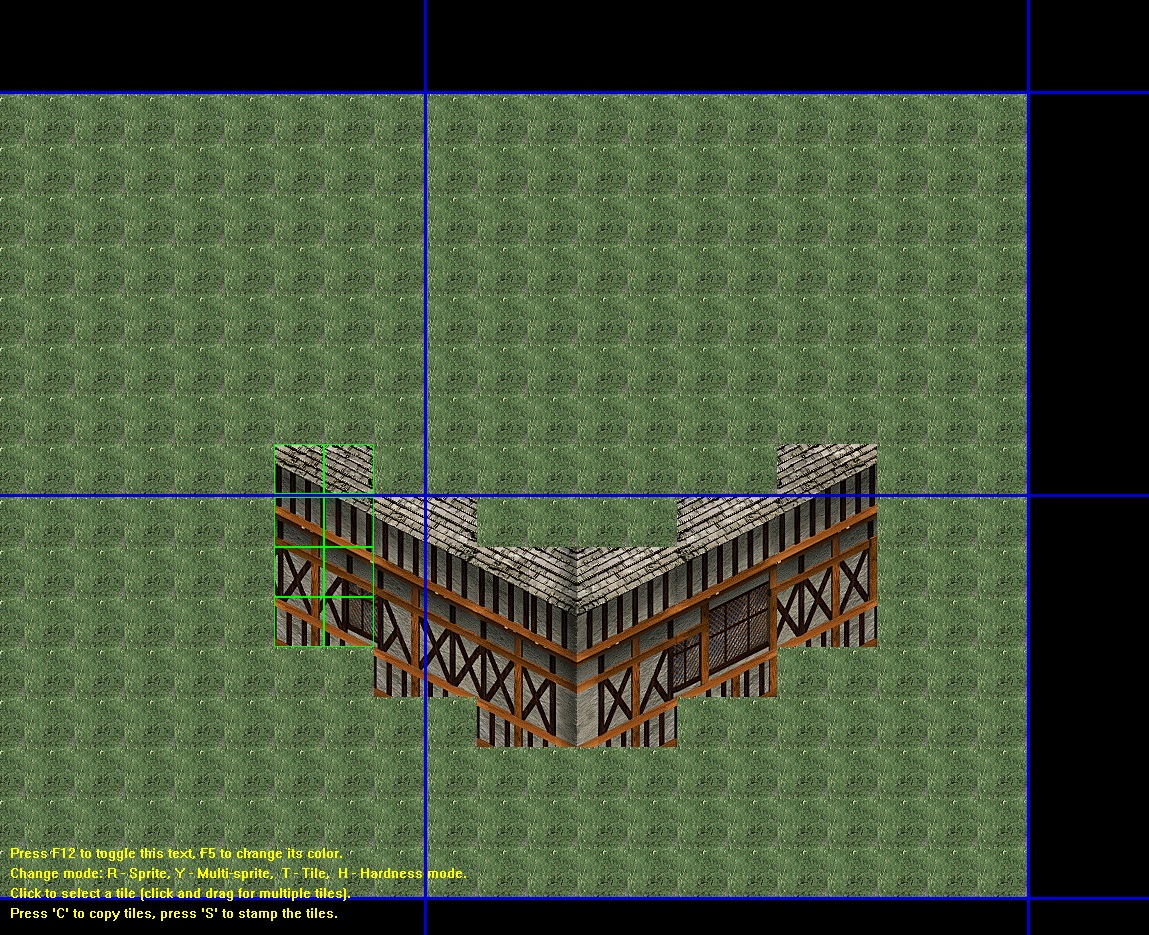
Start out with the tiles. Right-facing walls are in tileset 34, left-facing walls are in tileset 35, and they come in units of 4x2.
Note the extra shading on the last two units in tileset 35. This is for corners in front. There seem to be no tiles with shading for corners in the back. On the other hand, even the original game doesn't use the shaded/non-shaded versions consistently.
An example layout: here. Be aware of window placement, as windows span multiple units.
And that's it for tiles. We're going to surround them on every side with sprites, for which you may need to enable screenmatch occasionally.
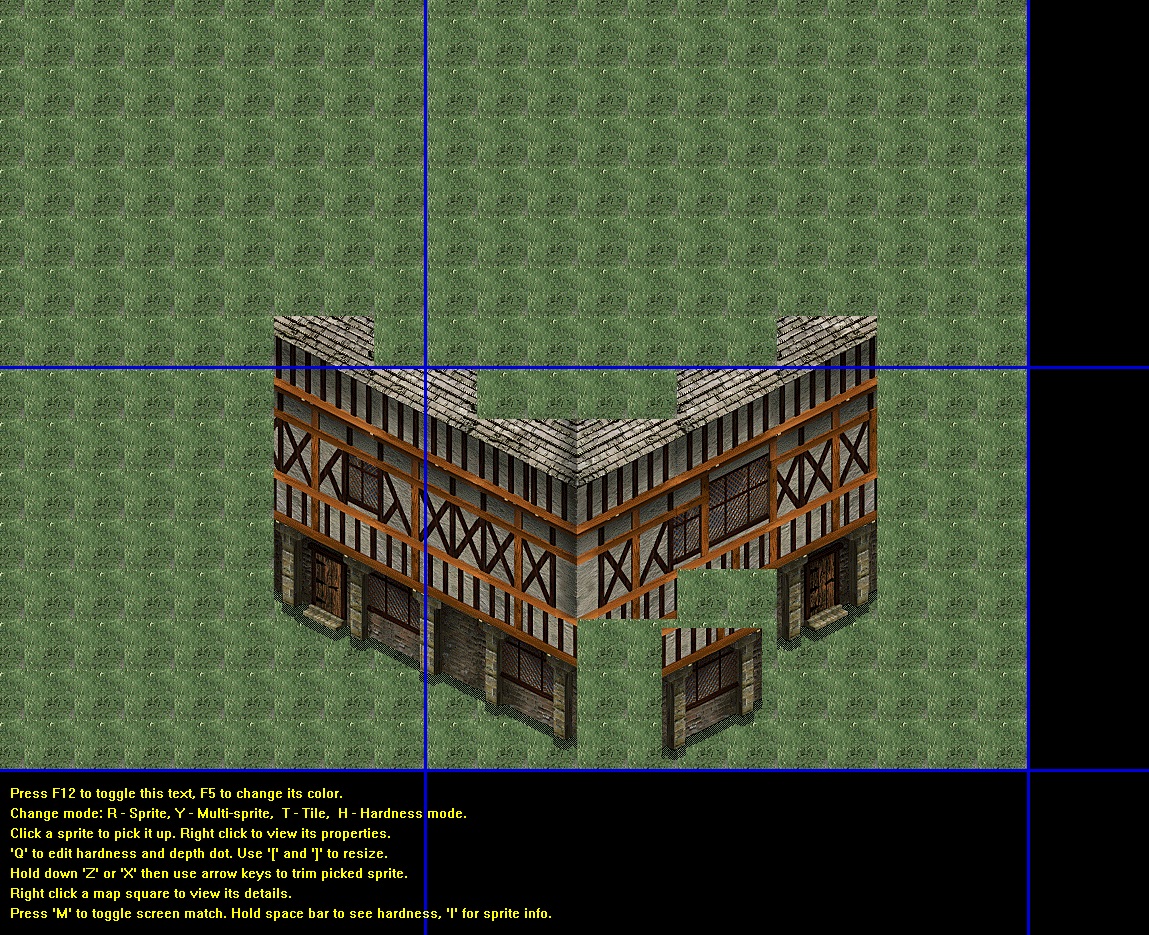
They're all in sequence 33, so take a look at that now. You'll see a lot of ground-level walls (with or without doors, windows, and again shading for the left-facing walls), a couple of roofs, and some edge-cases.
Place the ground-level walls first, as in these screenshots: in progress, finished. Note that I screwed up the shading, so don't make that mistake yourself. Finally, make sure the windows all line up correctly. They may span across multiple sprites again.
Now the sides. Frames 2 and 11 can be used for the bottom-right, frames 7 and 10 for the middle-right, frames 18 and 19 for the bottom-left, and frames 24 and 28 for the middle-left. The difference between them is, again, the presence of windows.
Again some screens: in progress, finished. (I still haven't fixed the shading in the front corner. Sorry.)
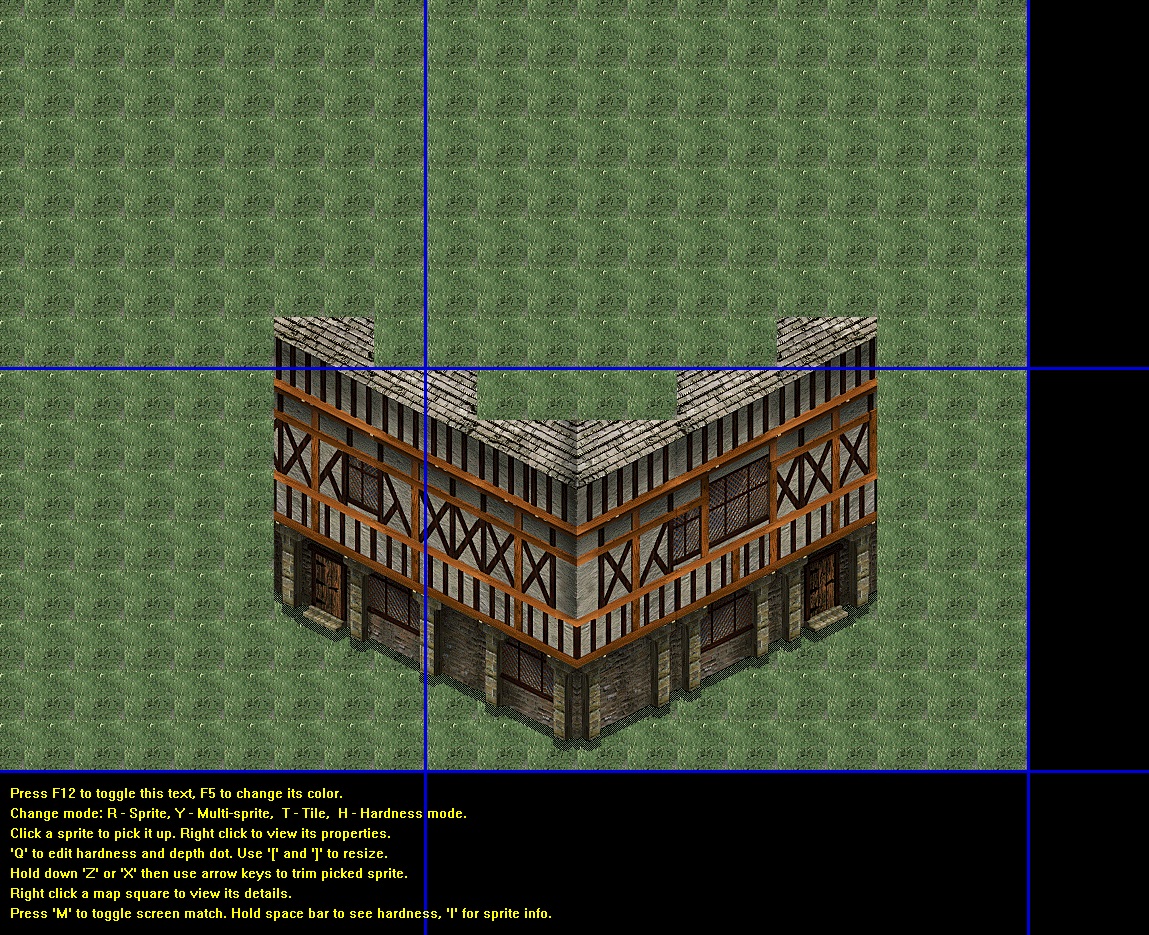
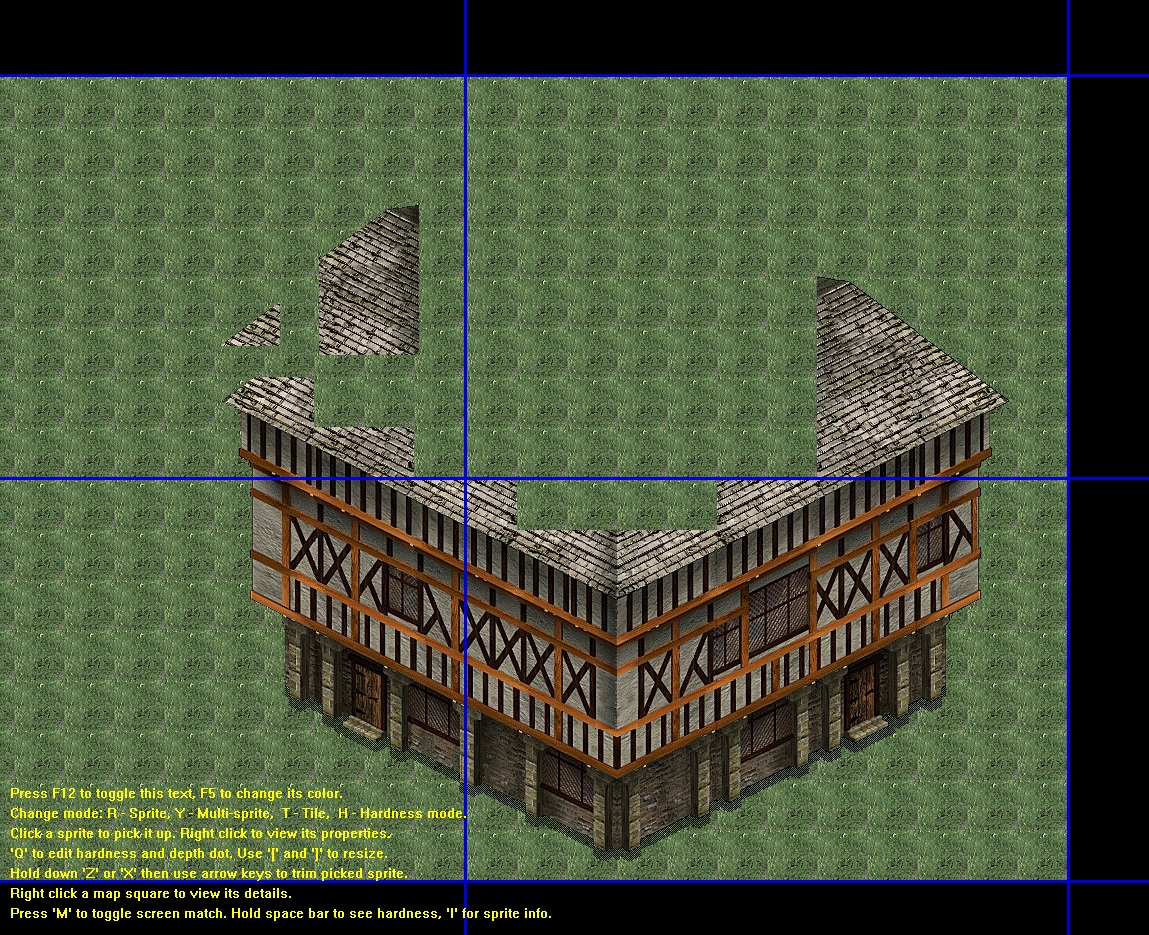
Finally, time for the roof. We'll start with the ends of the roof, which consist of two parts: a small triangle (frames 8 and 25. One for either side), and one that actually shows the end of the roof (frame 9 for the right side, frames 26 and 27 for the left side. One of them has shading, which I screwed up. Again.): in progress.
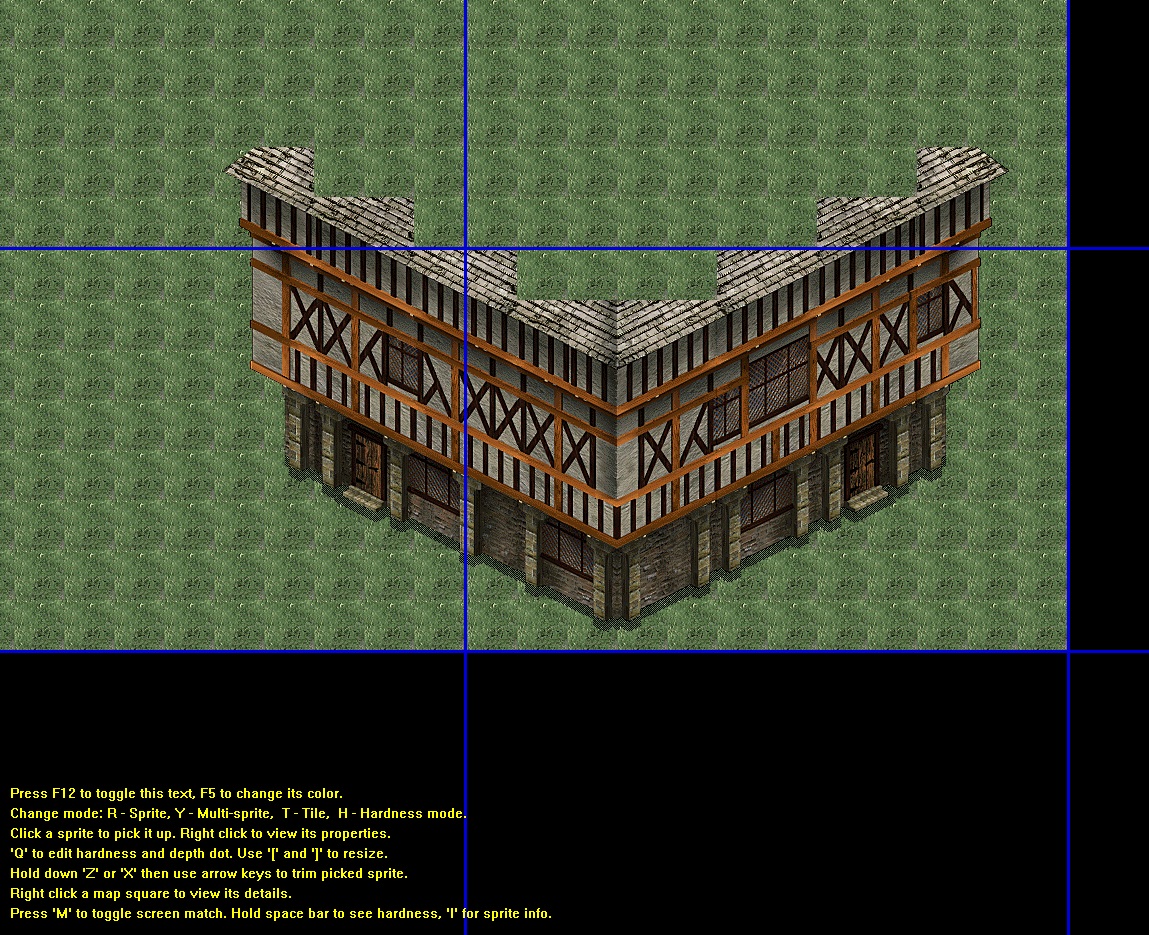
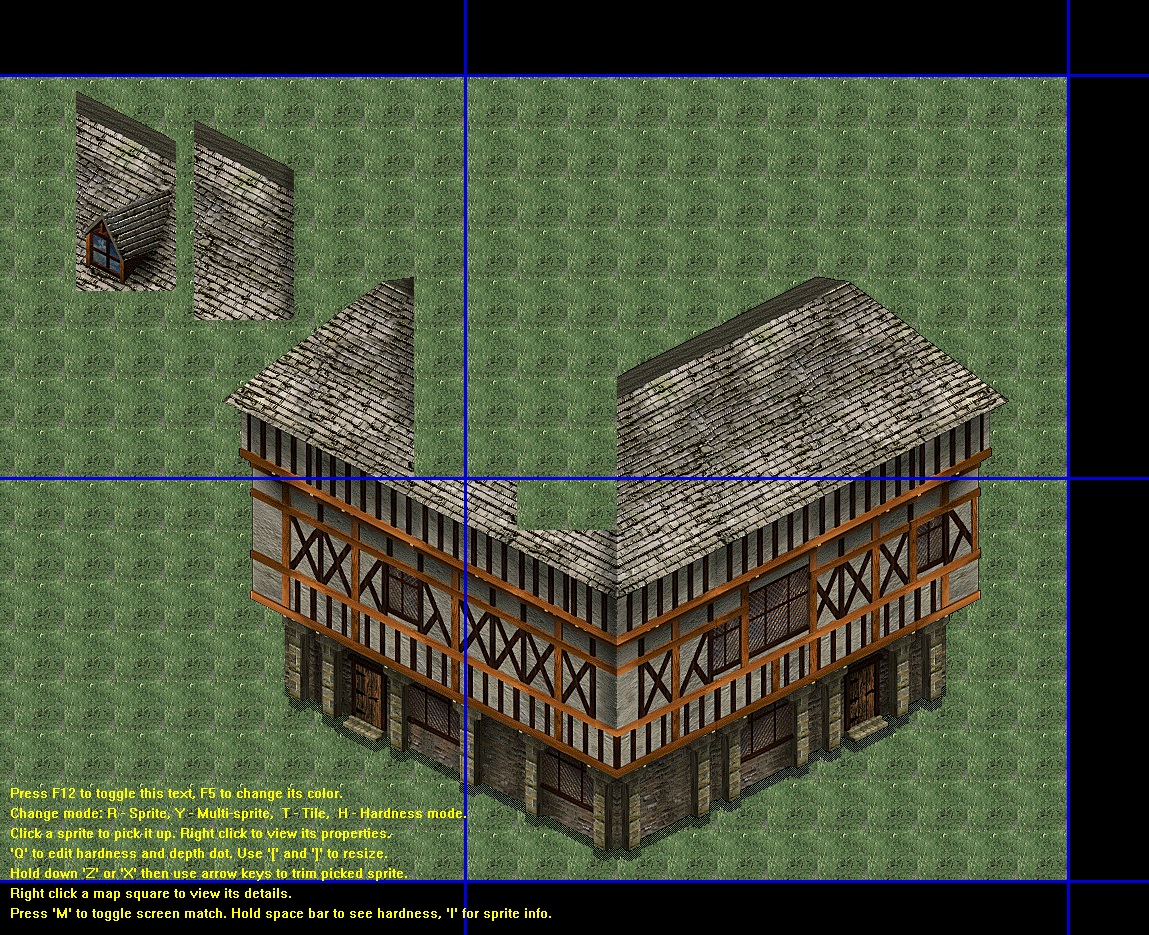
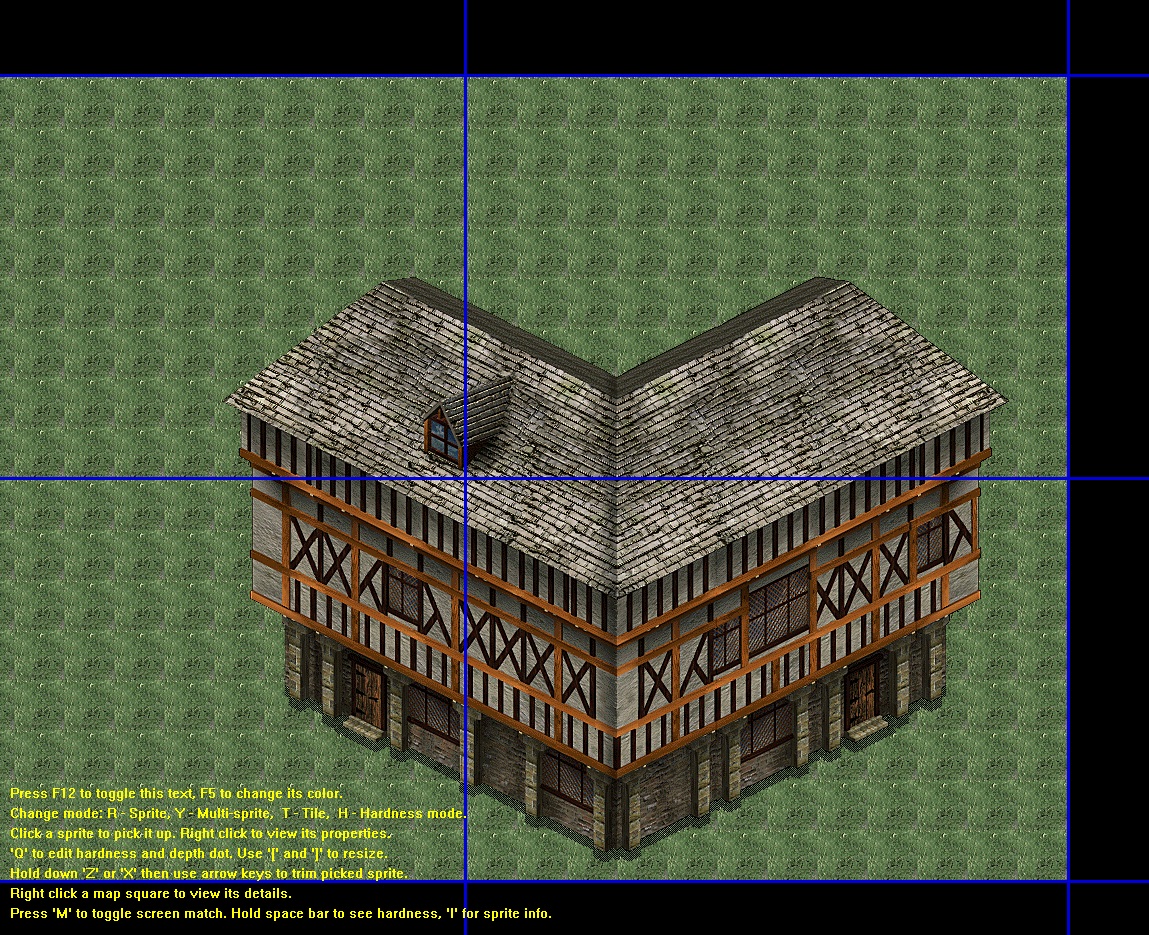
What remains is the rest of the roof. There are frames with roof window, and frames without, and for the left side, both exist with extra shading. in progress (shading still messed up), finished (and I've sneakily fixed the shading).
Hope this is of some use. You'll still need to take care of tile hardness yourself. And also don't forget to mess with depth dots, unless you want Dink (or other sprites) to suddenly appear in front of the roof, or behind the ground-level walls. The building looks still rather bland, but you can go nuts with signs and other decorations.
First things first: realize that large buildings *without* a corner in front are not possible, simply because there are no appropriate roof sprites.
Start out with the tiles. Right-facing walls are in tileset 34, left-facing walls are in tileset 35, and they come in units of 4x2.
Note the extra shading on the last two units in tileset 35. This is for corners in front. There seem to be no tiles with shading for corners in the back. On the other hand, even the original game doesn't use the shaded/non-shaded versions consistently.
An example layout: here. Be aware of window placement, as windows span multiple units.
And that's it for tiles. We're going to surround them on every side with sprites, for which you may need to enable screenmatch occasionally.
They're all in sequence 33, so take a look at that now. You'll see a lot of ground-level walls (with or without doors, windows, and again shading for the left-facing walls), a couple of roofs, and some edge-cases.
Place the ground-level walls first, as in these screenshots: in progress, finished. Note that I screwed up the shading, so don't make that mistake yourself. Finally, make sure the windows all line up correctly. They may span across multiple sprites again.
Now the sides. Frames 2 and 11 can be used for the bottom-right, frames 7 and 10 for the middle-right, frames 18 and 19 for the bottom-left, and frames 24 and 28 for the middle-left. The difference between them is, again, the presence of windows.
Again some screens: in progress, finished. (I still haven't fixed the shading in the front corner. Sorry.)
Finally, time for the roof. We'll start with the ends of the roof, which consist of two parts: a small triangle (frames 8 and 25. One for either side), and one that actually shows the end of the roof (frame 9 for the right side, frames 26 and 27 for the left side. One of them has shading, which I screwed up. Again.): in progress.
What remains is the rest of the roof. There are frames with roof window, and frames without, and for the left side, both exist with extra shading. in progress (shading still messed up), finished (and I've sneakily fixed the shading).
Hope this is of some use. You'll still need to take care of tile hardness yourself. And also don't forget to mess with depth dots, unless you want Dink (or other sprites) to suddenly appear in front of the roof, or behind the ground-level walls. The building looks still rather bland, but you can go nuts with signs and other decorations.


